Overview
What you will build
In this lab you will govern Webex Agentic Apps, connect their MCP servers to a prepared VS Code agent, and use two practical meeting workflows.
1 - Meeting follow-up assistant
- Find a completed meeting and retrieve its transcript or summary.
- Extract decisions and action items with supporting evidence.
- Request human approval before creating spaces or posting messages.
- Create a follow-up Webex space with a structured recap.
- Optionally translate the output and generate an attendance report.
2 - Meeting quality troubleshooting assistant
- Find a target meeting through the official Meetings MCP server.
- Call a custom MCP server that wraps the Webex Meeting Qualities REST API.
- Identify affected participants and degradation windows.
- Generate an incident summary and recommended checks.
- Enter Incident Mode - a dedicated coordination space created only after approval.
The workspace already contains reusable skills. You will inspect and customize them after completing each workflow, then coordinate them from a single business request in the capstone.
Learning Objectives
By the end of this lab, you will be able to:
- Explain the difference between an MCP server, an MCP client, a tool, and a REST API.
- Enable and govern official Webex Agentic Apps in Control Hub.
- Connect an AI client to Webex Meetings and Messaging MCP servers.
- Discover tools and inspect their required inputs and outputs.
- Use meeting and messaging tools safely with least privilege and human approval.
- Extend an agent with a custom MCP server backed by a Webex REST API.
- Customize agent skill files to match your organization's workflow.
- Coordinate multiple skills, MCP tools, and a REST API from one business request.
Disclaimer
Although the lab design and configuration examples could be used as a reference, for design related questions for your production enrionments please contact your representative at Cisco, or a Cisco partner.
The Webex MCP servers, tool names, OAuth scopes, and client behavior shown in this guide reflect the versions validated for this event. Revalidate against the current Webex documentation before applying anything here to your own organization.
Lab Access
Your pod is a Cisco dCloud Windows desktop with Webex App, a browser, and a prepared LAB-11161 VS Code workspace. You do not need to install software or create the MCP configuration. Use Google Chrome on your own computer for both the lab guide and dCloud Web RDP.
- In Chrome on your own computer, open the WebexOne dCloud Expo lab.
- Enter your email address and accept the lab terms. Expo assigns your session ID; keep it available if you need a proctor's help.
- Select Open to launch the browser-based RDP session for wkst1, using the Windows user cholland.
- On the lab desktop, open Session_Info.txt. It contains the Control Hub and Webex App sign-in details for this pod. Use those details only inside this lab desktop.
- Keep the lab guide open in a second Chrome tab on your own computer. Copy prompts from that tab and paste them directly into VS Code in the RDP tab. You do not need to open the guide inside the lab desktop. Open Control Hub and the Webex developer portal inside the lab desktop when the guide asks you to sign in with lab accounts.
If Expo access or sign-in fails, give your session ID to a proctor. Do not enter lab account passwords into this guide.
If direct paste into the RDP session does not work, use Guacamole's clipboard panel or ask a proctor. See the Troubleshooting Matrix.
Getting Started
What you should know
Basic Webex familiarity helps, but you do not need prior AI, MCP, or coding experience. The lab explains JSON and HTTP concepts as you encounter them.
In one minute: Copilot Chat in VS Code is the MCP client. It connects to MCP servers, which offer individual actions called tools. The official Webex servers offer meeting and messaging tools; the prepared local quality server calls a Webex REST API behind the scenes. A skill is a reusable instruction file that guides the agent's workflow, not another connection or permission. See MCP vs. REST API for more detail.
Your first five minutes
- Confirm you are in the wkst1 browser desktop as cholland and note your Expo session ID.
- Open Session_Info.txt on the desktop and locate the separate Control Hub and Webex App account details.
- Keep the guide open in a local Chrome tab and dCloud Web RDP in another. Copy prompts from the guide into VS Code through the RDP tab.
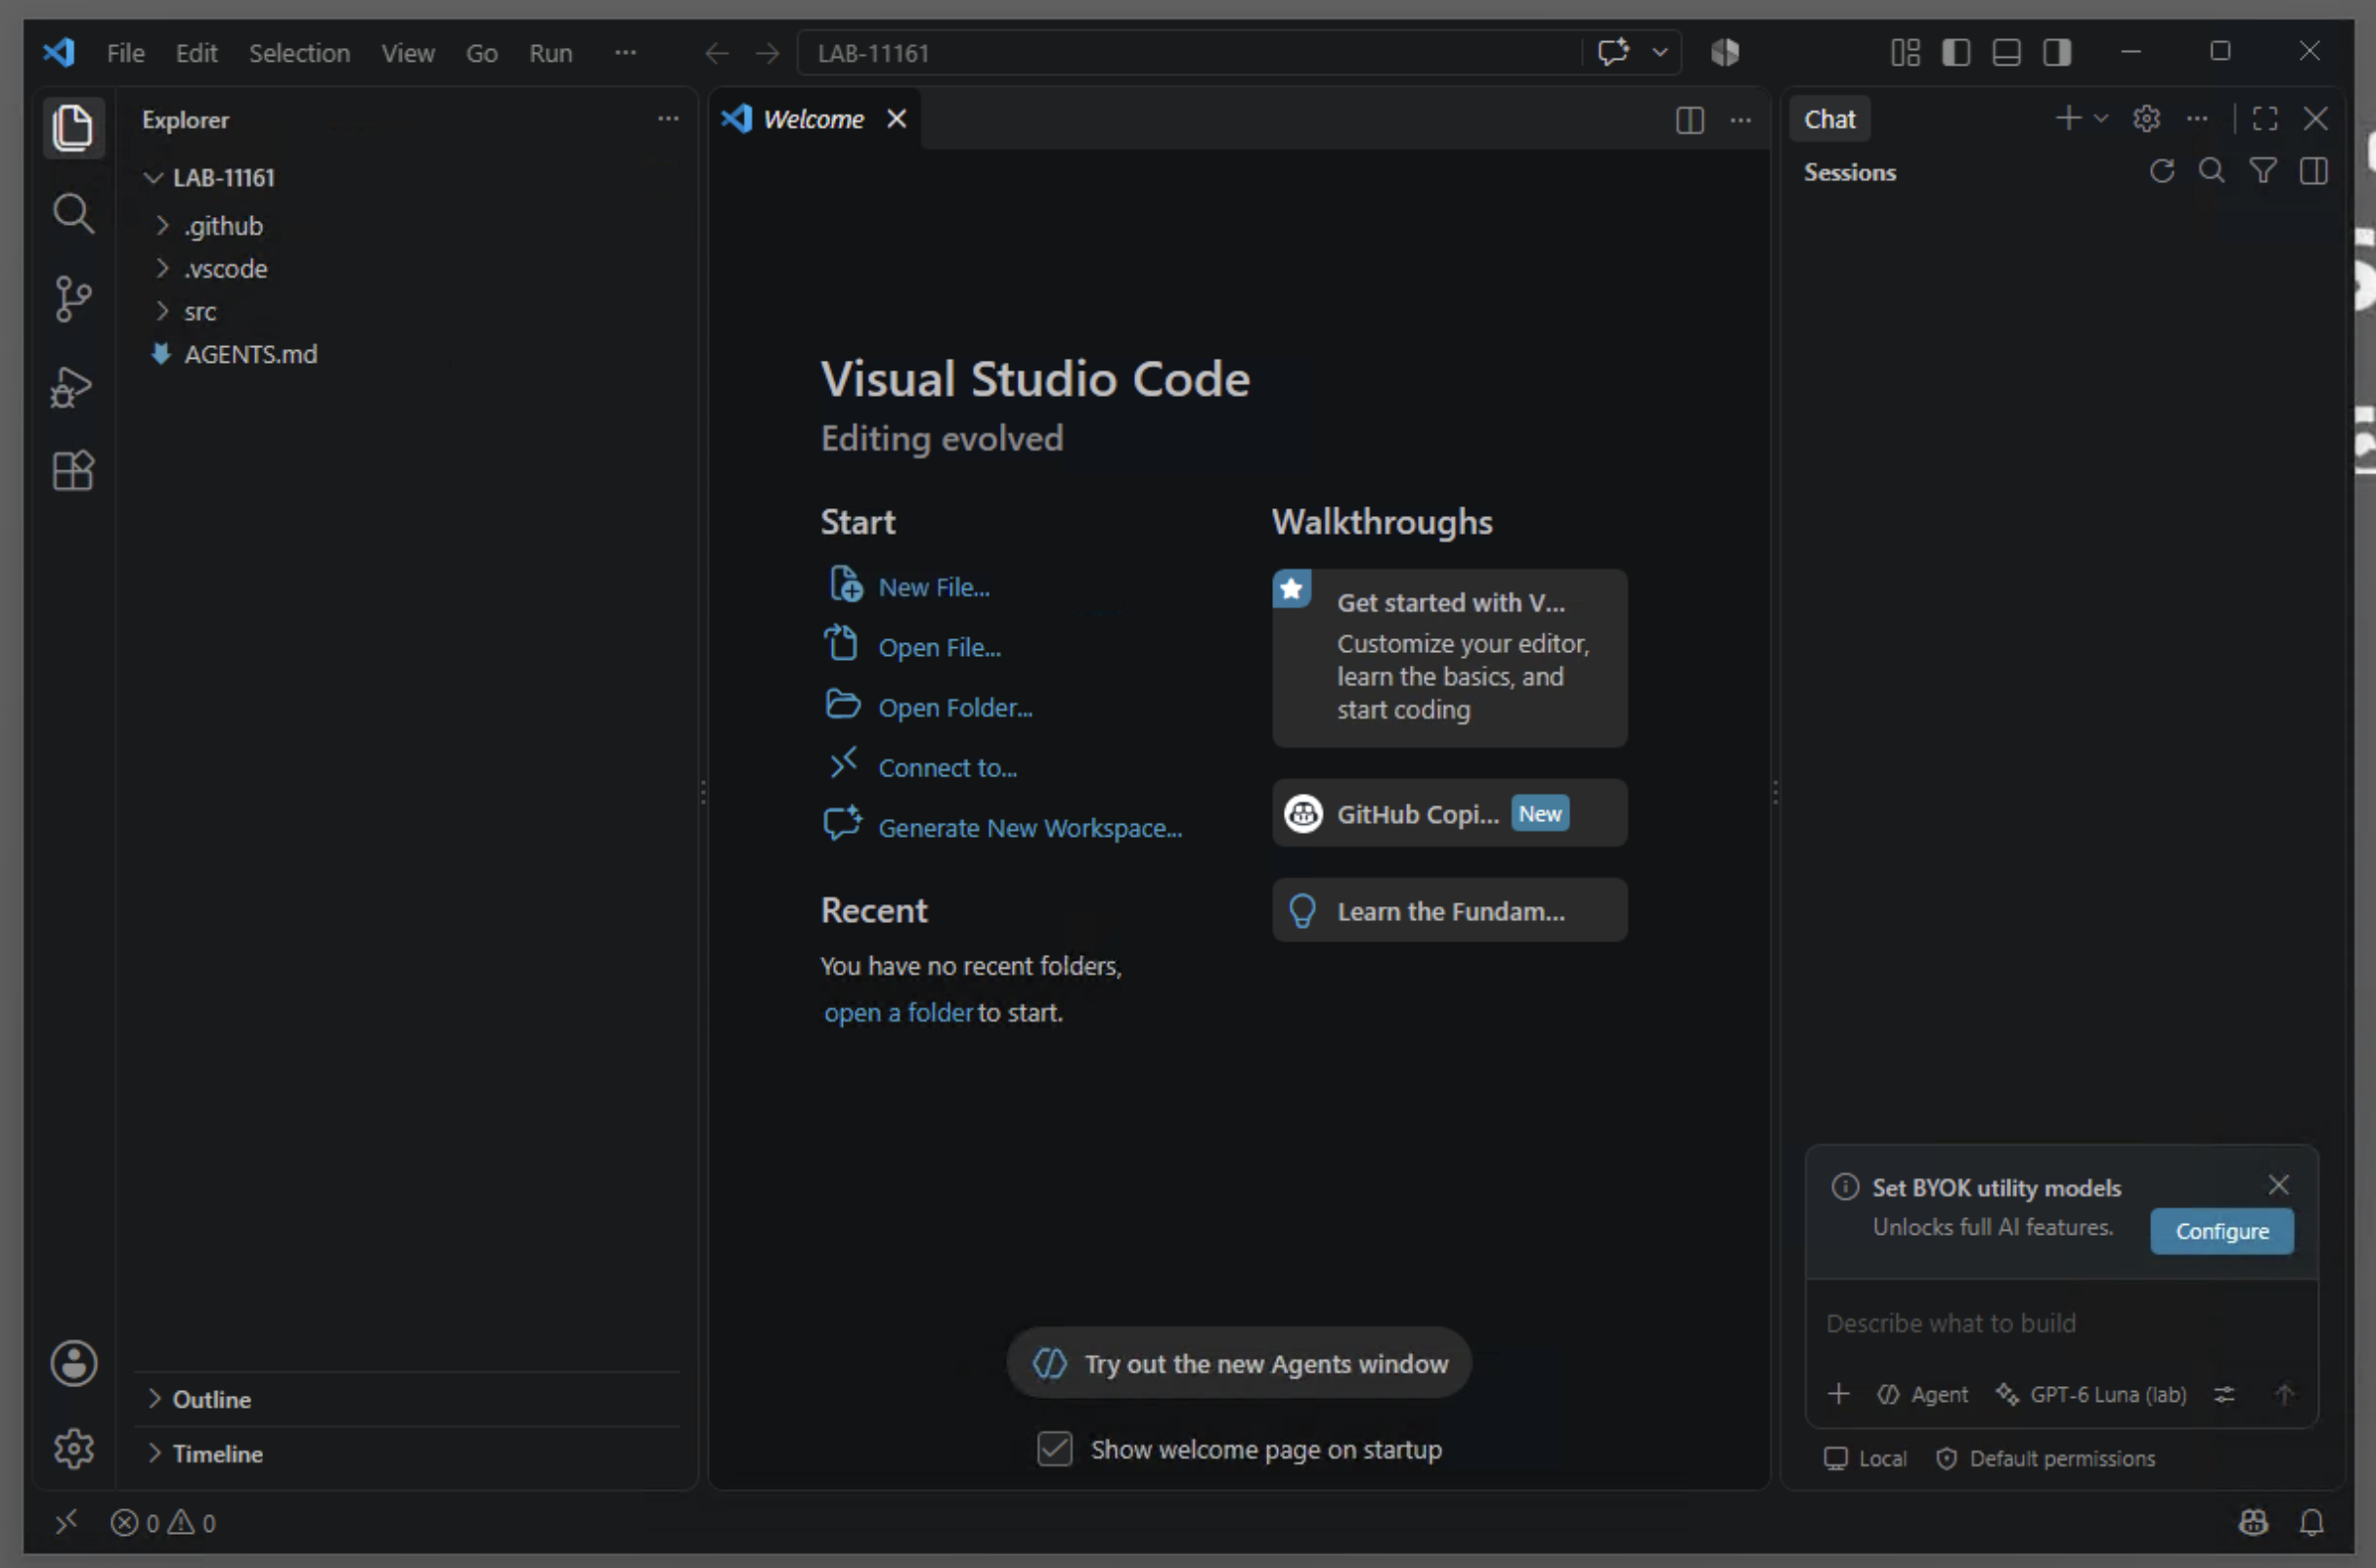
- Open Visual Studio Code from the desktop shortcut. The LAB-11161 folder should already be open with
.github,.vscode,src, andAGENTS.mdvisible in Explorer. The chat panel should offer Agent, GPT-6 Luna (lab), and Local. You will start the Webex MCP servers in Lab 1.
Lab Rules
Use only the lab environment
Work only with the lab organization and seeded data provided. Do not connect to your production Webex organization.
- Review before approving. Keep Copilot Chat on manual tool approvals, review the tool name and inputs, and approve only the actions you intend.
- Don't trust output blindly. AI-generated summaries and recommendations may be incomplete or incorrect. Verify before acting on them.
Lab Flow and Timing
This instructor-led session is 120 minutes (2 hours). Keep the core path moving; sections marked if time allows can be completed after the session. Never rush through a Webex write approval to stay on schedule.
| Time | Module | What you do |
|---|---|---|
| 0-5 min | Orientation | Enter the dCloud pod and inspect the prepared workspace |
| 5-25 min | Lab 1 | Enable Agentic Apps, generate tokens, start prepared MCP servers |
| 25-45 min | Lab 2 | Discover, predict, invoke, reject, and approve MCP tools |
| 45-75 min | Lab 3 | Complete a follow-up and customize its preloaded skill |
| 75-105 min | Lab 4 | Analyze quality data and inspect its preloaded skill |
| 105-115 min | Lab 5 | Coordinate both skills in a cross-workflow capstone |
| 115-120 min | Wrap-up | Save your skill changes, complete the survey, and locate the take-home bundle |
Note
This lab is designed as crawl, walk, run. Complete the core path first. Each lab marks its advanced exercises so that you can go deeper if you finish early.